Semolina porridge is my ultimate comfort breakfast. Creamy, silky, and ready in under 20 minutes, this nostalgic dish brings together simplicity and satisfaction in every spoonful.

Semolina porridge is budget-friendly, nourishing, and incredibly versatile. You can serve it plain with a knob of butter and sugar, or go fancy with fresh berries, compotes, nuts, syrups—even chocolate.
It’s ideal year-round and especially perfect on chilly mornings or when you just want something cosy and satisfying. And because it cooks so fast, it’s great for busy weekdays when I still want something homemade. Honestly, it’s fan-freaking-tastic and deserves a spot in every kitchen.
Jump to:
Ingredients
This dish may be simple, but every ingredient brings something essential to the table. Here’s why I chose each one:
Semolina: This is the heart of the porridge. It thickens beautifully while staying smooth and silky. Go for "fine" semolina for porridge. It is widely available in the grocery stores, but also Eastern-European shops should have great selection of semolina porridge.
Milk: Full-fat milk makes the porridge rich and creamy. You can use half milk, half water for a lighter version, but I love the full. If you want to be treated like a Tzar - then even use cream instead of milk!
Sugar: Just a spoonful lifts the natural creaminess of the milk and semolina. It’s not overly sweet, just gently comforting.
Salt: A tiny pinch balances the sweetness and enhances the flavour. Never skip this!
Butter: Stirred in at the end, butter gives the porridge a velvety, melt-in-your-mouth finish.
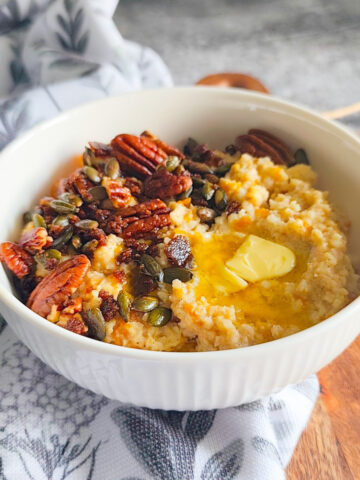
Toppings (optional but encouraged!): Think juicy berries, golden honey, fruit jams, or a handful of chopped nuts. These add texture, colour, and flavour.

See recipe card for quantities.
Instructions
This semolina porridge is super easy to make—but like all great things, it benefits from a bit of attention. Follow my steps and you’ll get perfect results every time.

- Step 1: Start by pouring the milk into a saucepan. Add the sugar and a small pinch of salt, and give it a stir. Place over medium heat and bring it almost to the boil—look for bubbles around the edge, but don’t let it boil over.

- Step 2: Now, this is the critical bit: add your semolina one spoonful at a time, and keep stirring constantly. Don’t rush it. In my porridge no lumps are allowed!!! If you add it all at once, you’ll end up with a clumpy mess. Even if it looks a bit runny, don’t add more semolina—it thickens a lot as it cooks.

- Step 3: Let the porridge gently cook for another 3 to 5 minutes. Stir non-stop. If the heat’s too high, it will burn at the bottom—and trust me, scrubbing burnt porridge off a pan isn’t how you want to start your day. The texture should become smooth, thick, and creamy.

- Step 4: Turn off the heat. Stir in a knob of butter and put a lid on the pan. Let it sit for 5 to 10 minutes. During this time, the semolina settles, the flavour deepens, and the consistency turns perfect. While it rests, get your toppings ready.
Bonus Tips:
- If you’re unsure about thickness, let the porridge rest before adjusting. Don’t overcook!
- Use a whisk if you're worried about lumps—it helps keep the texture silky.
- My to-go ratio is 6 tablespoon for 1lt of milk - this amount of porridge is enough to feed my family of 4 (2+2) and some may have a second helping.

Serving Ideas & Storage Tips
I love serving semolina porridge warm with a colourful topping of berries and a drizzle of honey. But that’s just one way! You can serve it with:
- A swirl of jam and some toasted almonds
- Banana slices and maple syrup
- A dusting of cinnamon and sugar
- A spoonful of berry compote
- Melted chocolate chips for a treat!
Leftovers? No problem. Store in an airtight container in the fridge for up to 3 days. Reheat gently with a splash of milk and knob of butter to loosen it back to its original creaminess. Just add milk, butter, stir and microwave for 1 minute, then stir again, add more milk if needed and heat again for 1 minute.
Want some more classic-slavic porridges and traditional recipes? Here you go:

5 Recipe Notes & Tips:
- Stir continuously while adding semolina to prevent lumps.
- Don’t increase semolina if porridge looks too runny—it thickens as it rests.
- Use full-fat milk for that luscious texture. Or even the cream.
- Butter makes all the difference—don’t skip it!
- Letting it rest with the lid on is key to silky consistency of semolina porridge.
FAQ
Q: Can I use plant-based milk instead of dairy?
Yes! Almond, oat, or soy milk all work well—just make sure they’re unsweetened so you can control the flavour.
Q: Can I prepare semolina porridge ahead of time?
Absolutely. Make a batch and store it in the fridge. Add a splash of milk and knob of butter when reheating to bring back that soft texture.
Q: Why did my porridge turn out lumpy?
You probably added the semolina too quickly or didn’t stir enough. Do not rush adding all the amount of semolina and stir constantly.
Q: Can I make it less rich?
Of course—use half milk, half water, or a lower-fat milk.
Q: Is semolina porridge gluten-free?
No, semolina is a wheat product.
Related
Looking for other recipes like this? Try these:
- Homemade Buttermilk Pancakes Recipe
- Brioche French Toast: The Best French Toast Recipe
- Mushroom Omelette Recipe
- Parsnip Fritters Recipe


Semolina Porridge

This semolina porridge is silky, creamy and comforting—made with just milk, semolina, and butter. A nostalgic breakfast that's quick and satisfying.
Ingredients
- 6 tablespoon semolina
- 1lt milk
- 1 tablespoon sugar
- Pinch of salt
- 1 knob butter. Large knob of butter. The more butter - the happier you will be!
- Optional toppings: fresh berries, jam, honey, chocolate chunks, nuts, syrup
Instructions
- Pour milk into a saucepan. Add sugar and a pinch of salt. Stir and bring to just under a boil.
- Gradually add semolina one spoonful at a time, stirring constantly. Don’t stop stirring until all semolina is added and combined.
- Continue to cook on medium heat for 3–5 minutes, stirring constantly. The mixture should thicken into a smooth, creamy porridge.
- Remove from heat, add the knob of butter, and stir. Cover the pan and let it rest for 5–10 minutes before serving. Top with your favourite additions and enjoy warm.