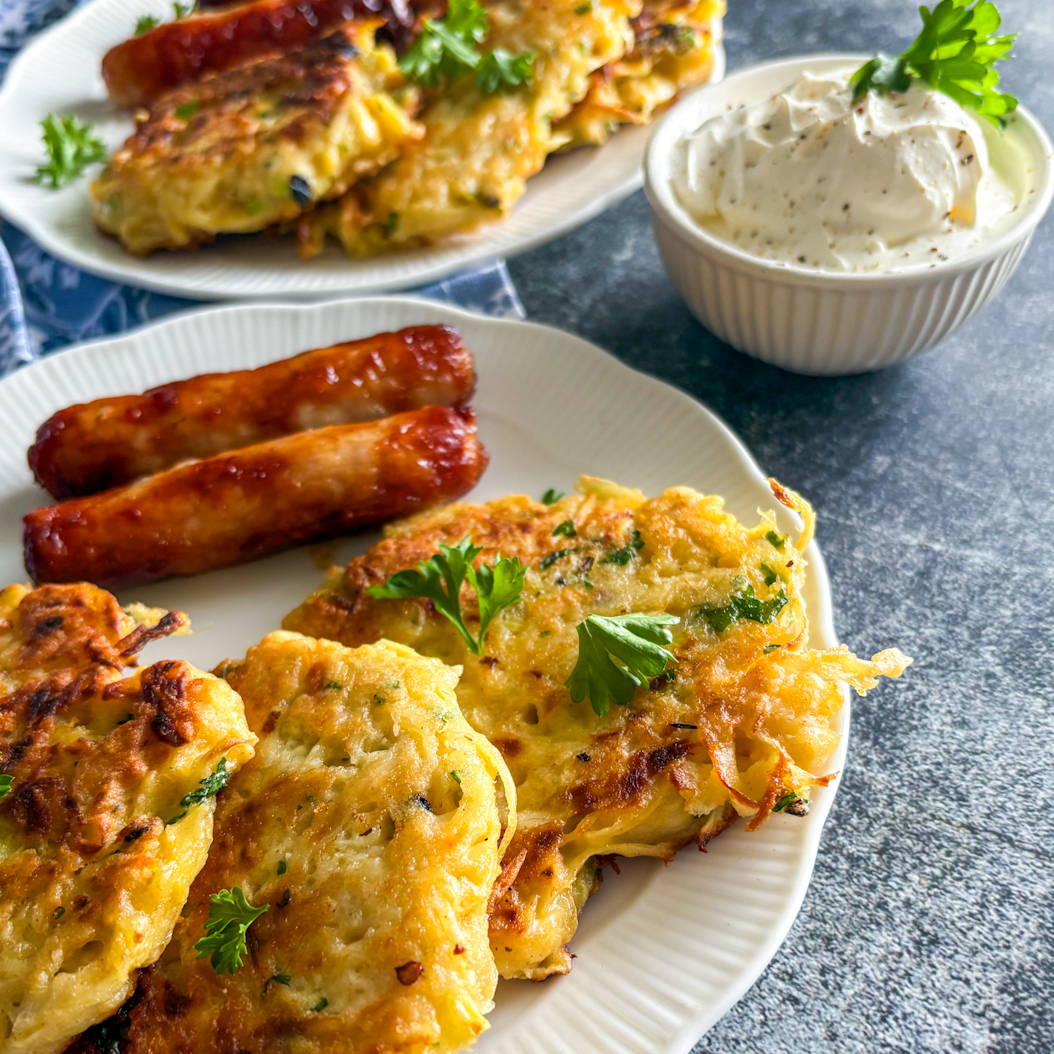
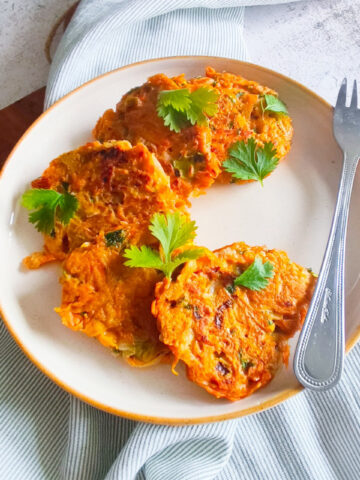
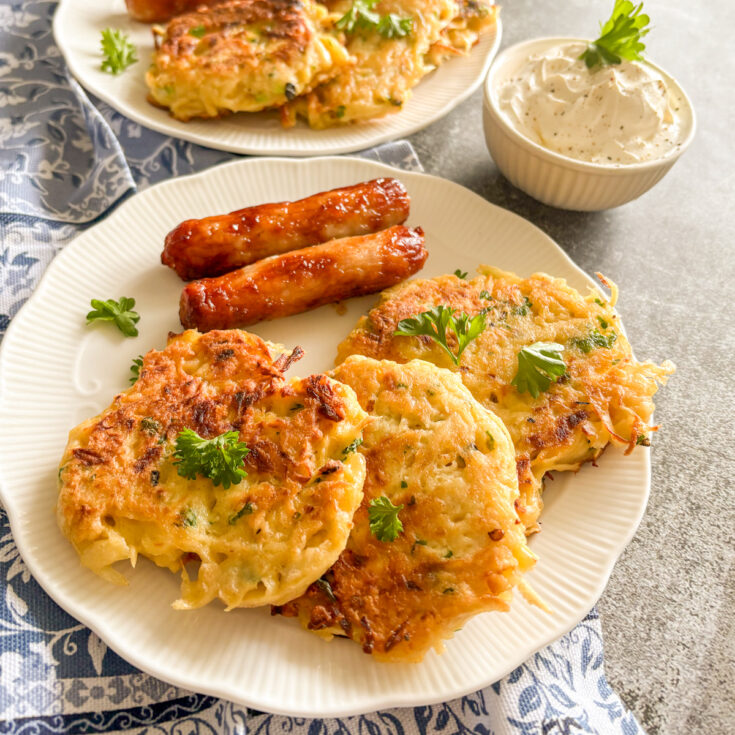
Parsnip Fritters are easy, satisfying, and the best way to transform a humble root vegetable into something delicious. Golden and crispy on the outside, soft and tender on the inside, they’re spiced just right and ready in 20 minutes.
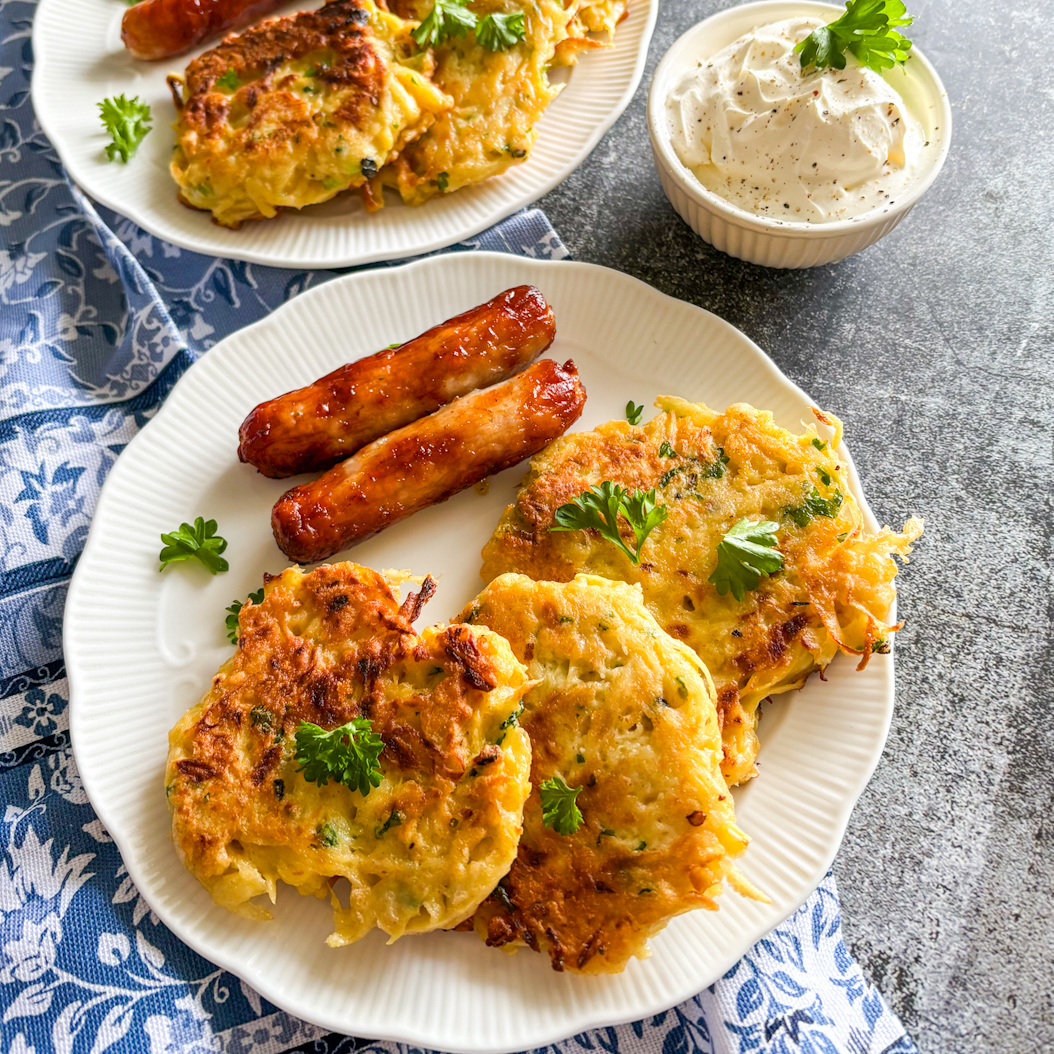
Parsnip fritters are something I cook when I need a simple meal that still feels like I put in some effort. The ingredients are basic, the prep is minimal, and the result is a pan of crisp, savoury fritters that work just as well with a fried egg in the morning as they do tucked into a wrap later on.
Jump to:
Ingredients for Parsnip Fritters
Parsnip fritters are a regular in my kitchen because they’re fast, reliable, and taste far more interesting than the ingredients suggest. I started making them to use up spare root vegetables. These aren’t heavy or dense like some fritters can be. The grated parsnip crisps beautifully while the spices bring warmth without overpowering. Parmesan adds flavour and structure without needing a lot of flour. I like that you can tweak the mix depending on what’s in your fridge, and they still turn out well.
Usually, I am using this list of ingredients when making Parsnip Fritters:
- Parsnips – grated raw. Slightly sweet, they crisp well and carry flavour.
- Scallions (spring onions) – milder than onion, quicker to cook, and they don’t overpower the fritter.
- Fresh parsley – adds brightness and a little bitterness to balance the cheese. It is optional, use it if you can find it on promotion.
- Parmesan – sharp, salty, and great for browning.
- Eggs – one to start, two if needed. They bind the mix.
- Plain flour – enough to hold everything together without turning it heavy.
- Ground cumin and turmeric – warm spices that work well with root veg.
- Red chilli flakes – optional, but a pinch balances the sweetness.
- Salt and black pepper – for basic seasoning.
- Neutral oil – for frying. Use sunflower, rapeseed, or light olive oil.
Instructions for Making Parsnip Fritters
The steps to make parsnip fritters are simple. Here is how I am doing it:
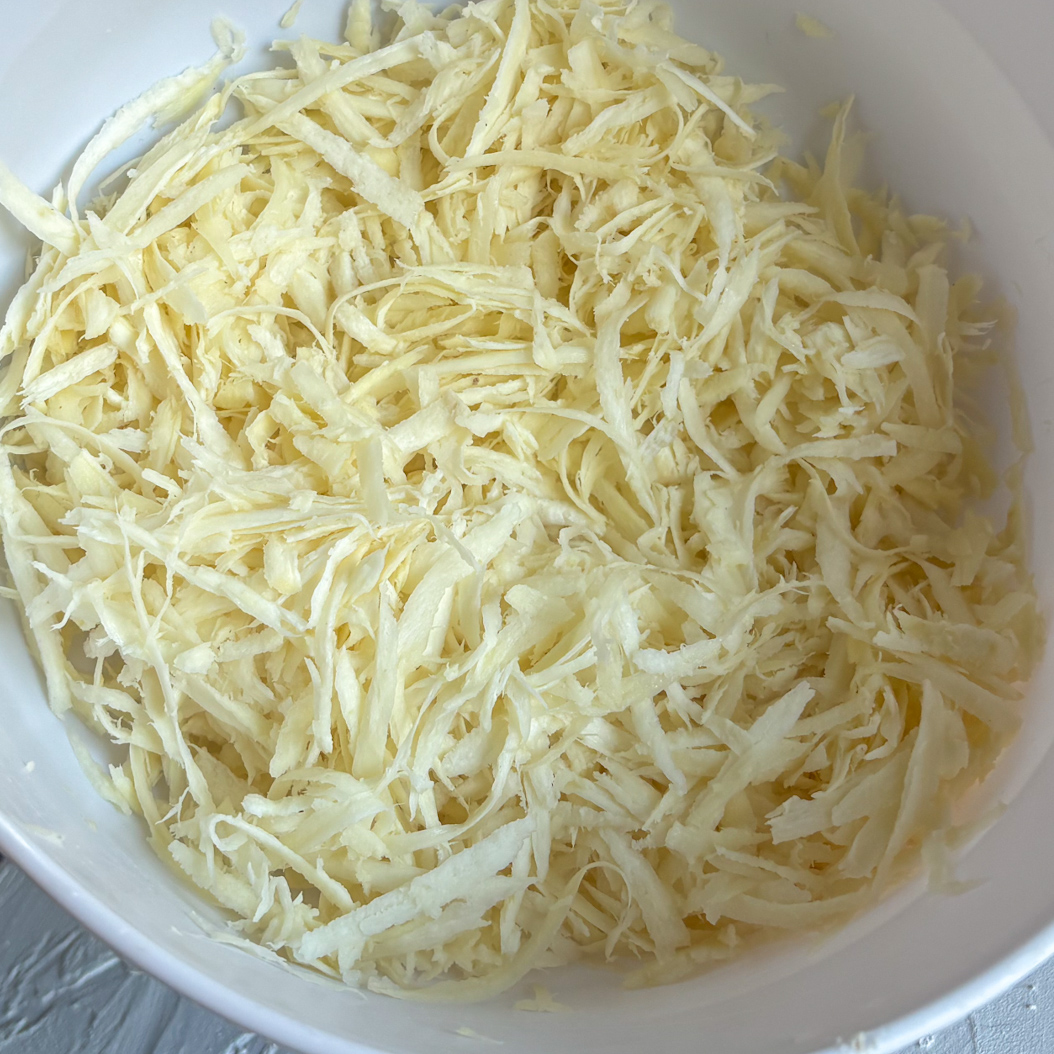
- Step 1: Peel and grate the parsnips into a bowl. Add a pinch of salt and let sit for a few minutes to help release excess liquid.
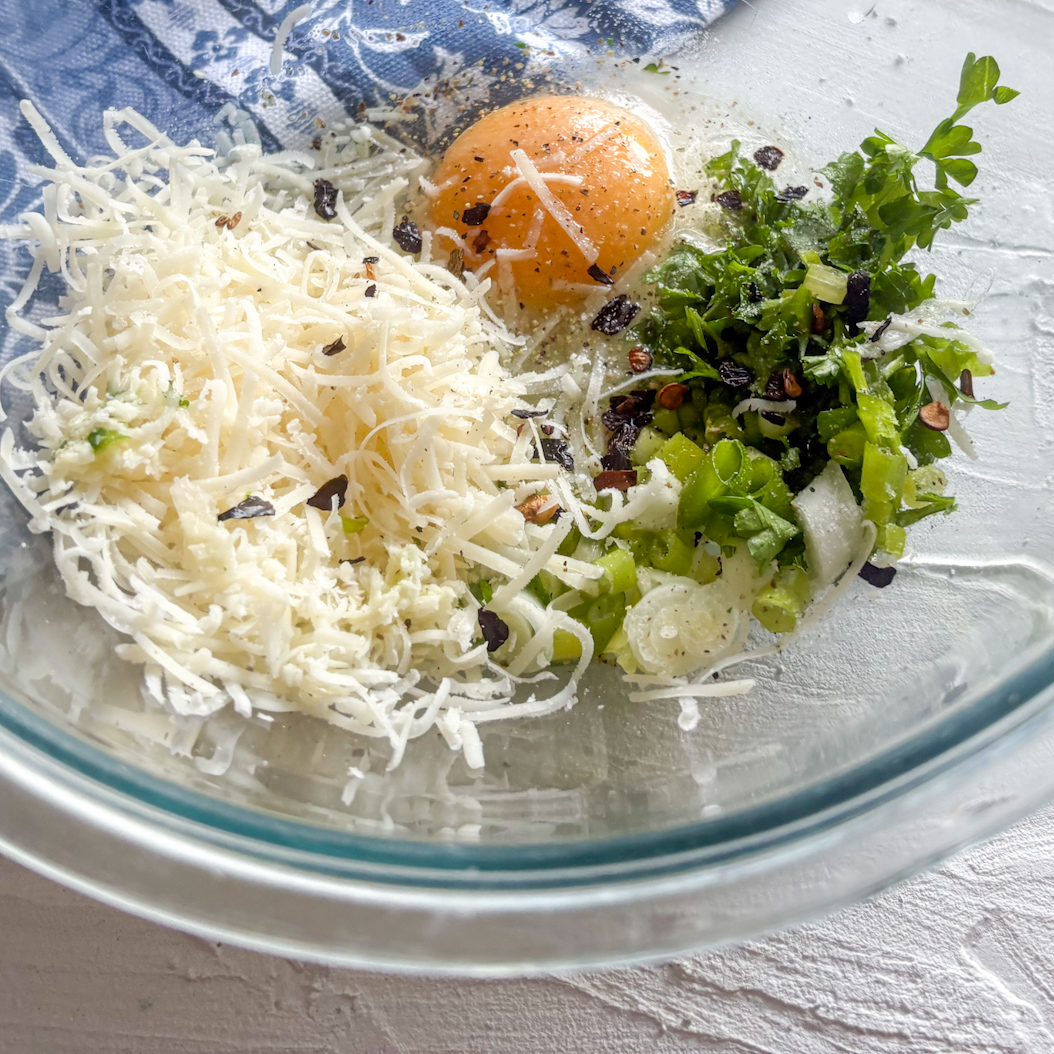
- Step 2: In a separate bowl, beat one egg and add scallions, parsley, parmesan, cumin, turmeric, chilli flakes, salt and pepper. Mix thoroughly until combined.
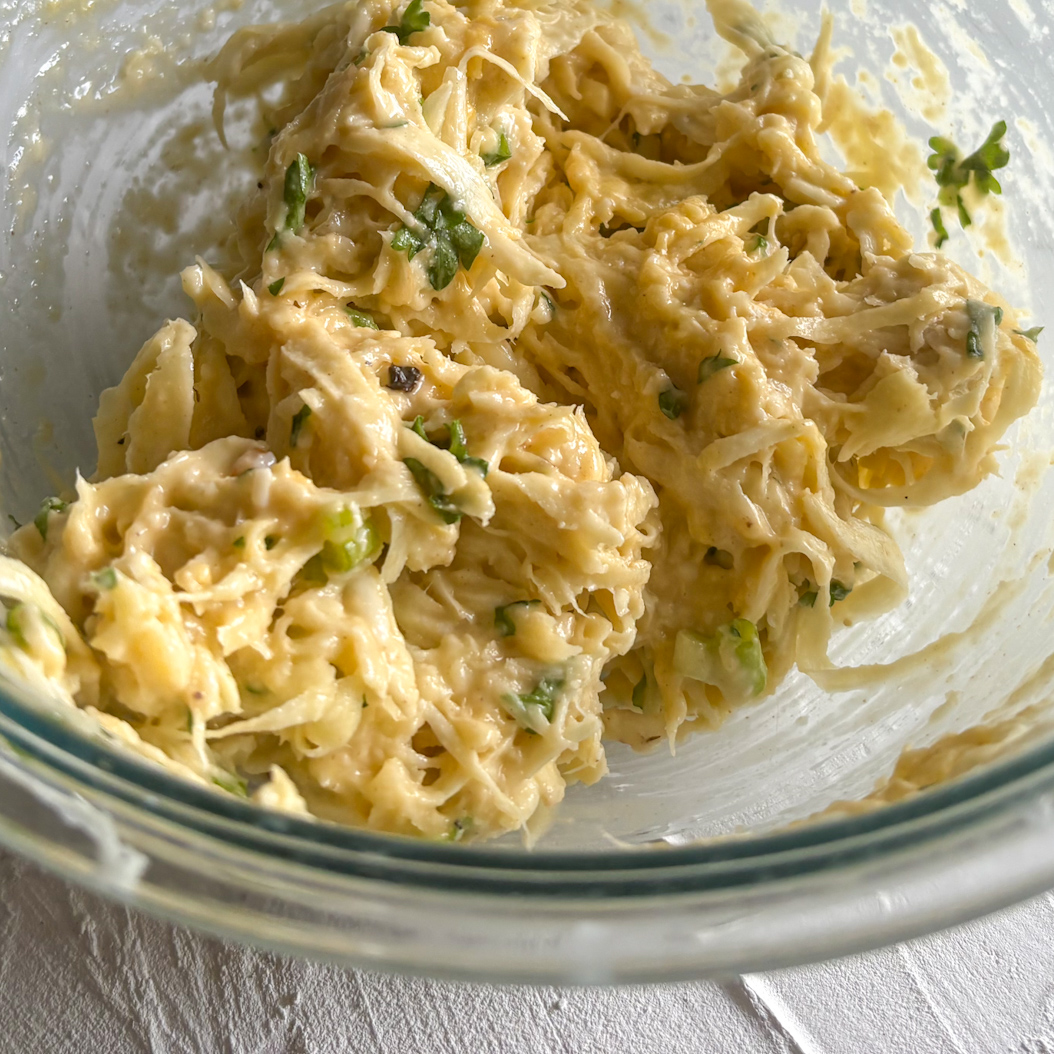
- Step 3: Squeeze the grated parsnips firmly using a clean tea towel or several paper towels to remove as much liquid as possible. Add the squeezed parsnips to the egg mixture, stir in the flour, and mix thoroughly. If the batter looks dry or crumbly, add the second egg. The batter should be moist and slightly wet, but not runny — you should be able to scoop and shape it without it spreading.
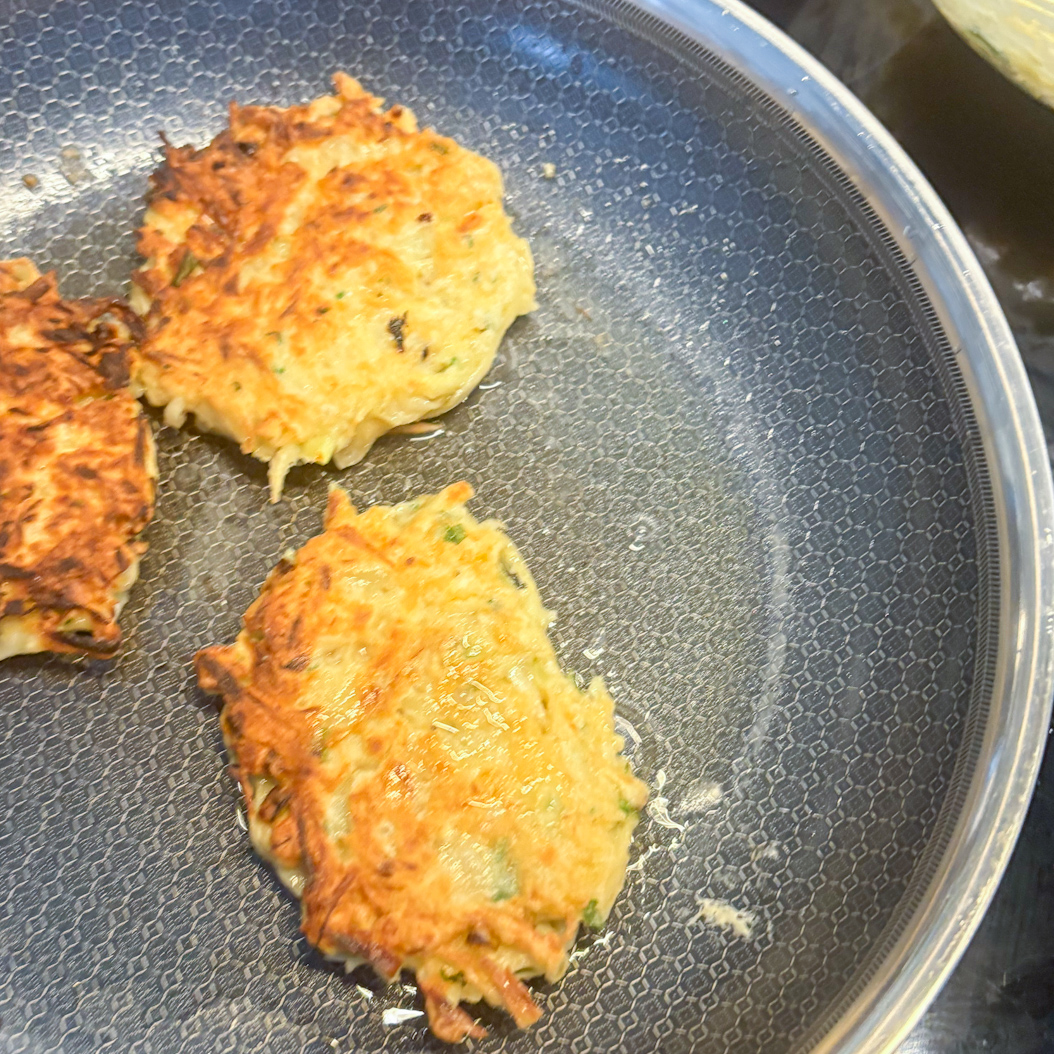
- Step 4: Heat a layer of oil in a non-stick or cast iron frying pan over medium heat. Use a spoon to scoop the batter into the pan and flatten it slightly with a spatula. Don’t overcrowd the pan. Fry for about five minutes per side, or until golden and crisp on both sides. Remove and drain on kitchen paper.
Cooking Tips:
- Use medium heat — too hot and they’ll brown too quickly; too low and they’ll go soggy. Keep the pan steady and adjust the heat if they’re browning too fast.
- Flip the fritters only once. Let the first side cook fully before turning to avoid breaking them apart.
How to Serve and Store Parsnip Fritters
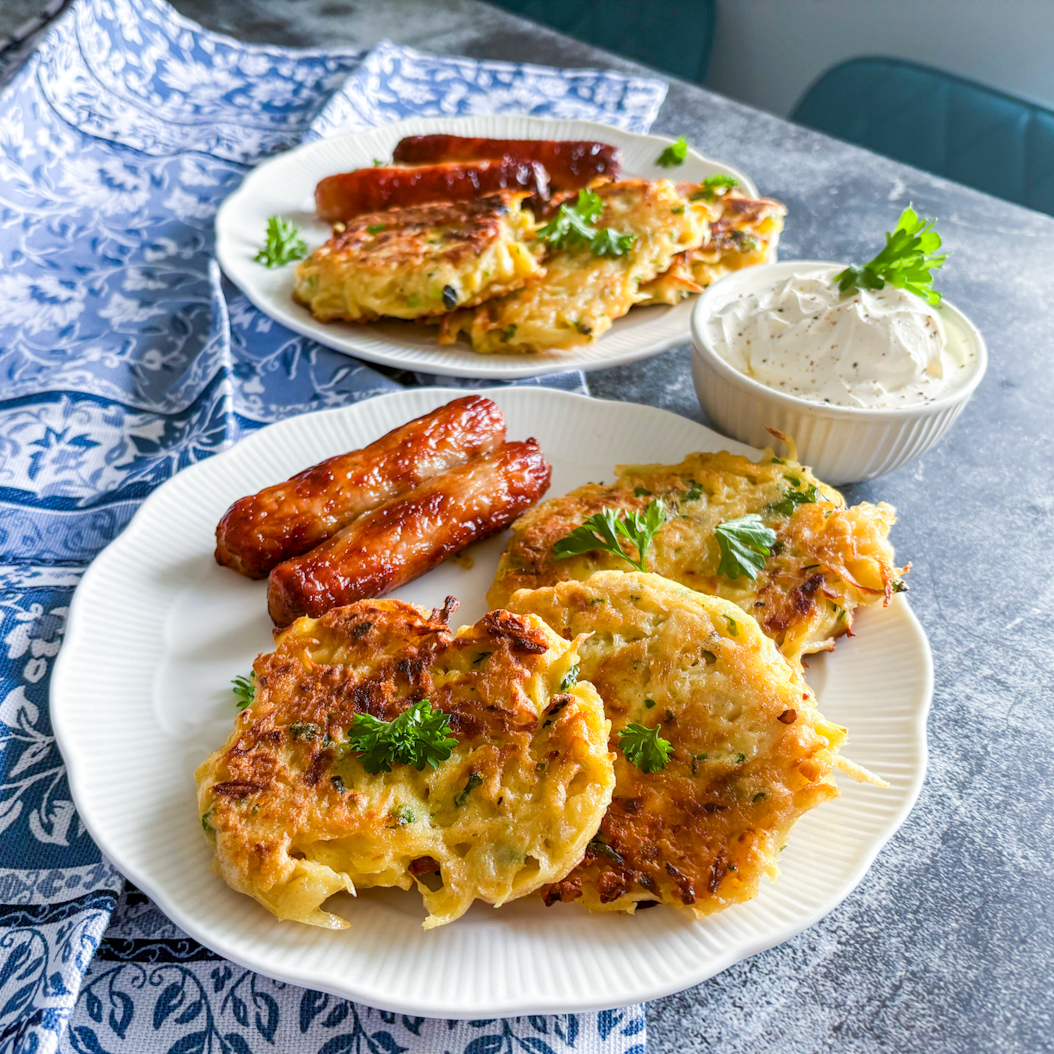
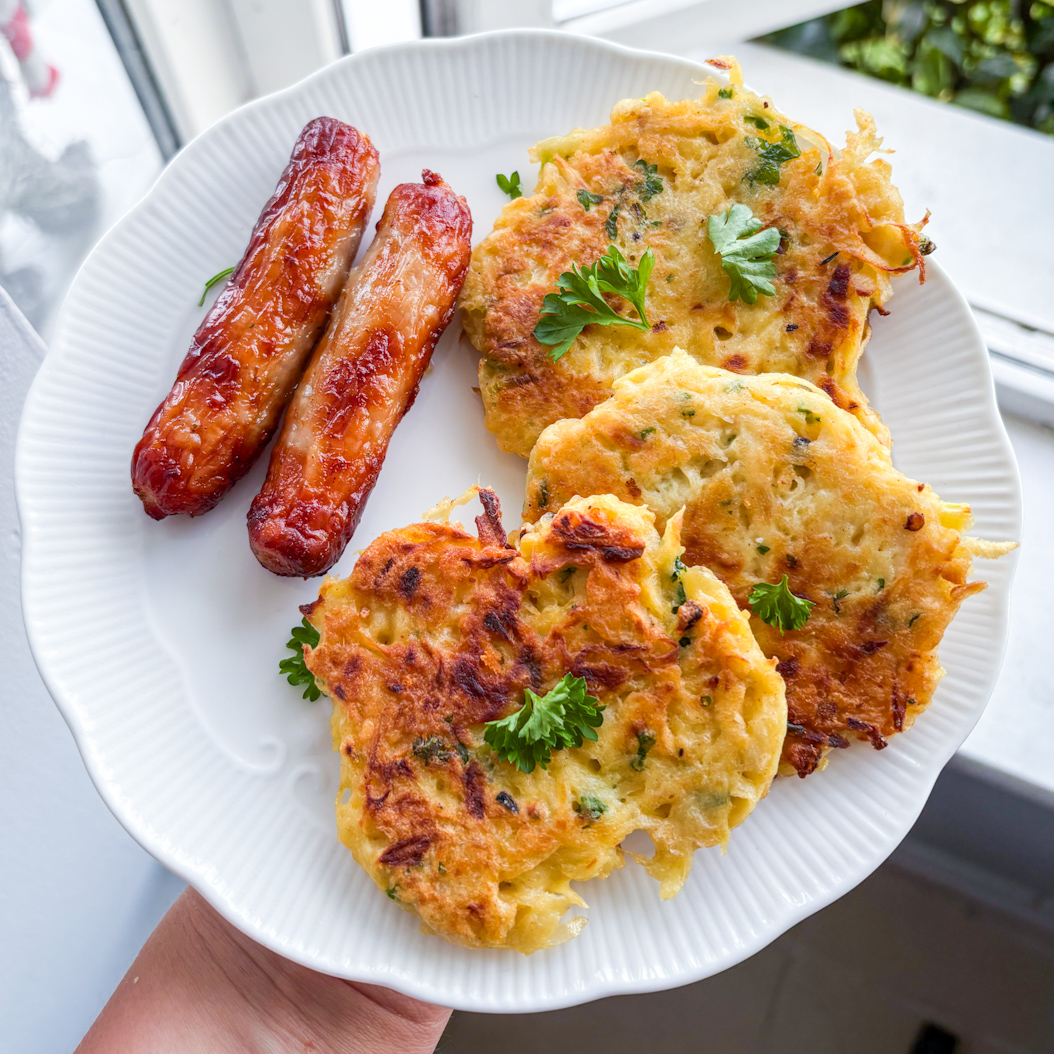
I love these crispy parsnip fritters with fried eggs and a spoon of yoghurt mixed with herbs and lemon juice. You can eat them straight from the pan, or let them cool and pack them into wraps or lunchboxes with a good dip. They also go well with roasted veg or as a base for a quick vegetarian burger.
Store leftovers in an airtight container in the fridge for up to 3 days. To reheat, use a dry frying pan or oven to bring back the crisp edges. They’re not great from the microwave. For longer storage, freeze them in a single layer, then stack with baking paper between. Reheat straight from frozen in a hot pan or oven.
Top Tips
- Always use a coarse grater. Finer graters break down the parsnip too much and make it too wet, which leads to soft, hard-to-flip fritters. A coarse grate helps with crisping and creates better texture. It also gives the finished fritters a more rustic, homemade look.
- Salt the parsnips before squeezing. Letting them sit with a bit of salt pulls moisture to the surface. This step makes squeezing much more effective. You’ll get a firmer, drier base that cooks more cleanly.
- Don’t skip squeezing out the water. This is one of the most important steps. Any extra moisture in the batter will make it difficult to shape and will cause steaming instead of frying. Use a clean towel or thick paper towels and squeeze with real force.
- Start with one egg. You might not need the second egg at all. Only add it if your batter is too crumbly or won’t hold shape. Too much egg can make the mixture too wet and cause it to spread.
- Don’t overdo the flour. It’s tempting to add more flour if your mix feels loose, but more flour will just make the fritters doughy. Instead, revisit how well you squeezed the parsnip. Drier veg = better texture.
- Use a wide pan and cook in batches. Giving the fritters space helps them cook evenly and keeps the oil hot. If the pan is crowded, they’ll steam instead of fry. You’ll get much better results if you work in two or three batches.
- Let the first side cook properly before flipping. If you try to flip too soon, the fritters might break or stick. Give them a good 5 minutes to form a crust. Once golden and set, they’ll turn easily.
FAQ
Can I make these gluten-free?
Yes — swap plain flour for chickpea flour or a gluten-free blend. Chickpea flour gives a nutty flavour and binds well. The texture remains crisp on the outside and soft inside. Just monitor moisture carefully, as different flours absorb liquid differently.
Can I bake them instead of frying?
You can, though they won’t be as crispy. Preheat the oven to 200°C, brush each fritter lightly with oil and bake for 20–25 minutes, flipping halfway. They’ll turn golden and firm but stay softer than the fried version. A good option if you prefer less oil.
Why are my fritters falling apart?
Usually, it’s too much moisture or flipping too early. Make sure to squeeze the grated parsnips well and don’t add the second egg unless needed. Also, allow the first side to brown properly before flipping — this creates the structure needed to hold them together.
Can I make the batter in advance?
It’s best to cook them soon after mixing. The longer the batter sits, the more liquid the veg will release, making it harder to work with. If needed, grate and squeeze the parsnips ahead, but mix just before cooking. This keeps the batter fresh and firm.
What oil is best for frying?
Use a neutral oil with a high smoke point like sunflower or rapeseed. Avoid strong flavours like coconut or extra virgin olive oil. You don’t need a deep layer — just enough to coat the bottom of the pan. Too much oil makes them greasy.
Related
Looking for other recipes like this? Try these:
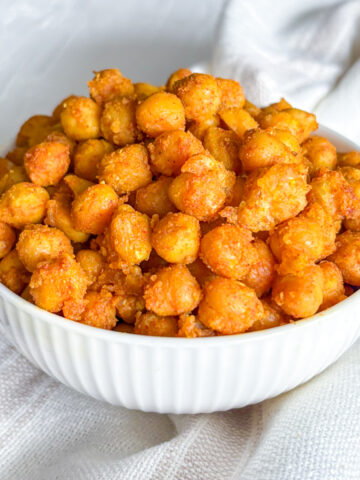
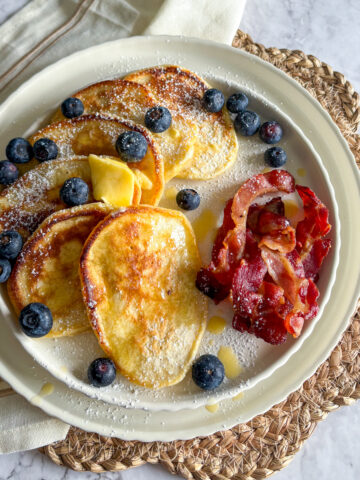
Breakfast

Pairing
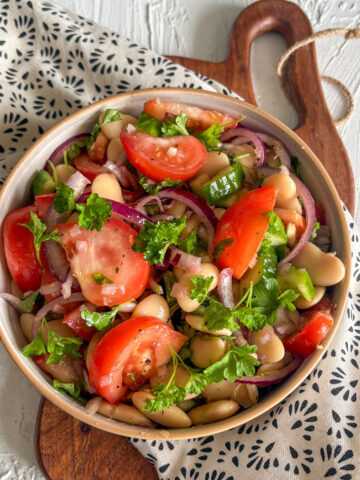
These are my favorite dishes to serve with Parsnip Fritters:
- Easy Butter Bean Salad With Tomatoes and Cucumber Recipe
- Crunchy Chickpea Salad Recipe
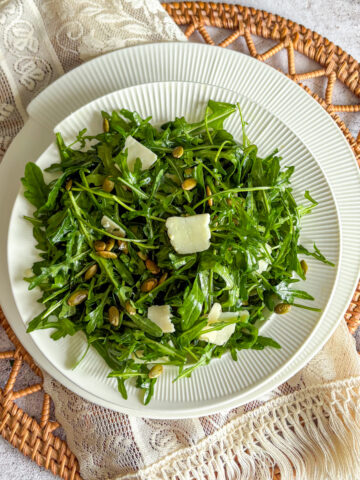
- Easy Rocket Salad Recipe
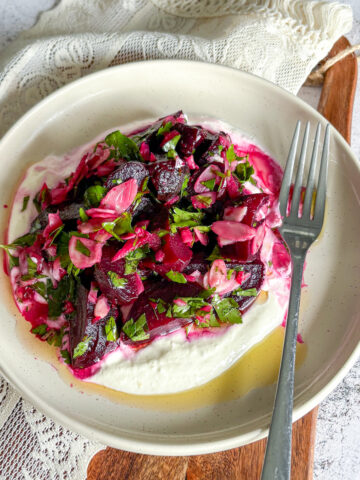
- Roasted Beet Salad Recipe

Parsnip Fritters
Parsnip fritters are savoury vegetable fritters made with grated parsnips, parmesan and herbs, shallow-fried until golden and crisp.
Ingredients
- 2 large parsnips or 3 medium, peeled
- 2–3 scallions, sliced
- 2–3 sprigs parsley, chopped
- 50 g grated parmesan
- 1–2 eggs
- 3 tablespoon plain flour
- 1 teaspoon ground cumin
- ½ teaspoon turmeric
- Pinch red chilli flakes
- Salt and pepper
- Neutral oil for frying
Instructions
- Grate the parsnips and place in a bowl with a pinch of salt. Let sit for a few minutes.
- In a separate bowl, beat one egg and combine with scallions, parsley, parmesan, cumin, turmeric, chilli flakes, salt and pepper.
- Squeeze the grated parsnip thoroughly and add to the egg mixture. Stir in flour and mix until the batter is moist but not runny. Add the second egg only if too dry.
- Heat oil in a frying pan. Spoon in the batter, flatten each fritter, and fry 5 minutes per side or until golden brown. Serve warm.