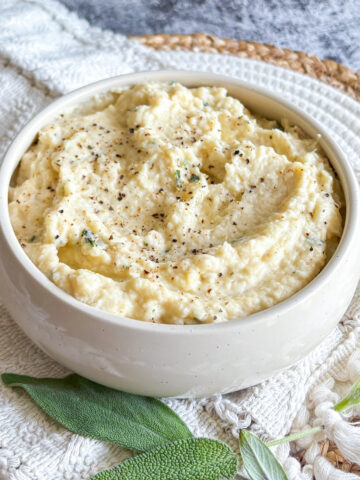
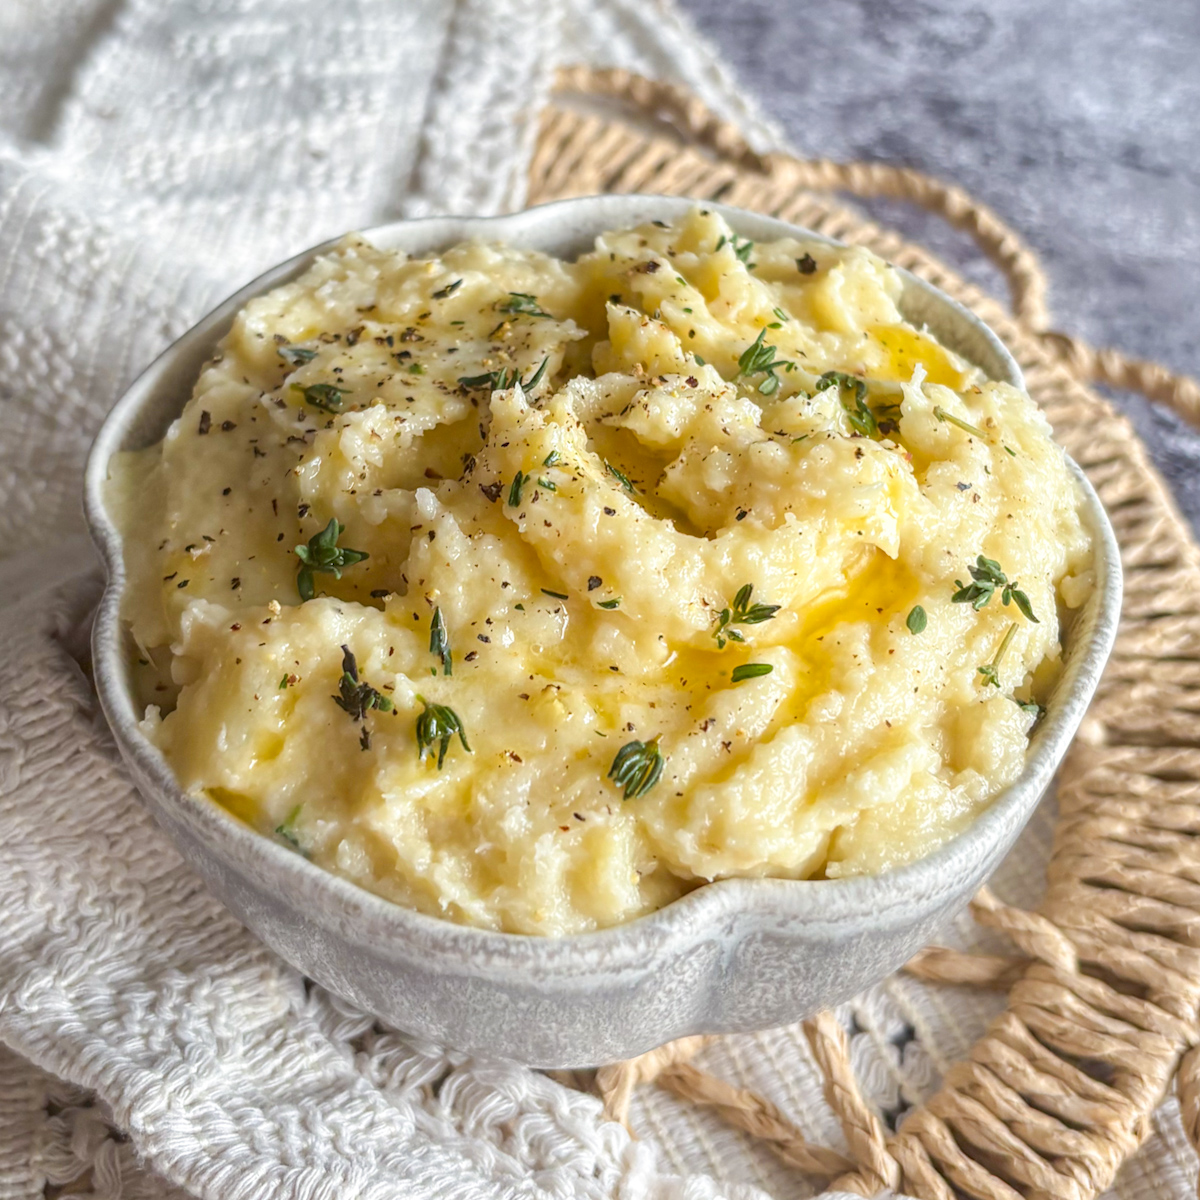
Parsnip and pear mash is a silky, buttery side dish that comes together in under 40 minutes with a handful of simple affordable ingredients. It tastes naturally sweet, lightly herby and quietly festive — a smooth, creamy parsnip mash that feels right at home next to roast pork, turkey or a midweek chop.
Parsnips are sweet and slightly nutty on their own, and ripe pears soften that earthy edge in the best way. The result is smooth, fragrant and lightly creamy without feeling heavy. A spoon of butter melted with fresh thyme leaves at the end gives the whole dish a warm, herby finish. It looks elegant in a serving bowl, takes very little hands-on work, and it holds well while the rest of the meal comes together.
If you have been looking for a creamy parsnip mash recipe UK readers can rely on for the festive table or a cosy weeknight, this is the one I reach for most often in autumn and winter.
Jump to:
- Ingredients for Creamy Parsnip and Pear Mash
- How to Make Parsnip and Pear Mash (Step by Step)
- How to Serve and Store Parsnip and Pear Mash
- Parsnip and Pear Mash Price Comparison Around the World
- More Easy Side Dishes to Try Alongside Parsnip and Pear Mash
- Top Tips for the Best Parsnip and Pear Mash
- Parsnip and Pear Mash FAQ
- Related
- Pairing
- Creamy Parsnip and Pear Mash with Thyme Butter
Ingredients for Creamy Parsnip and Pear Mash
Here is what you need for this parsnip and pear mash, with a short note on why each ingredient earns its place. Quantities live in the recipe card further down.
- Parsnips — firm, fresh parsnips are the base of this mash. They are naturally sweet, slightly nutty and turn beautifully silky once blended. Pick ones that feel heavy for their size and have smooth, pale ivory skin.
- Pears — use ripe but still firm pears. Conference pears work very well in the UK because they hold their shape during cooking. Pears bring a soft, gentle sweetness that balances the earthiness of the parsnips.
- Unsalted butter (for sautéing) — melted in the pot before the vegetables go in, butter helps the parsnips lightly caramelise on the edges. Those golden bits add depth and a quiet nuttiness to the finished mash.
- Unsalted butter (for the thyme butter) — a second batch of butter melted with fresh thyme leaves goes in at the end. This is what makes the parsnip and pear purée taste rich, herby and properly buttery.
- Fresh rosemary sprigs — kept whole and laid on top of the simmering pot, rosemary perfumes the cooking water without leaving little needles behind. Whole sprigs are easy to fish out and discard before blending.
- Double cream — a small splash adds body and that velvety, restaurant-style finish. You only need a little, since the butter already does a lot of the work.
- Fresh thyme leaves — picked off the sprigs and infused into melted butter, thyme leaves bring a warm, woodsy note that works beautifully with sweet root vegetables.
- Sea salt — sea salt seasons the cooking water and the finished mash. Always taste and adjust at the end.
- Ground black pepper — a fresh twist of pepper rounds out the flavour and stops the mash from tasting flat.
- Freshly grated nutmeg — just a pinch, stirred in right at the end. Nutmeg adds a quiet warmth that lifts the creamy parsnip mash without ever announcing itself.
How to Make Parsnip and Pear Mash (Step by Step)
Here is exactly how I cook this parsnip and pear mash at home. Four short steps, mostly hands-off.
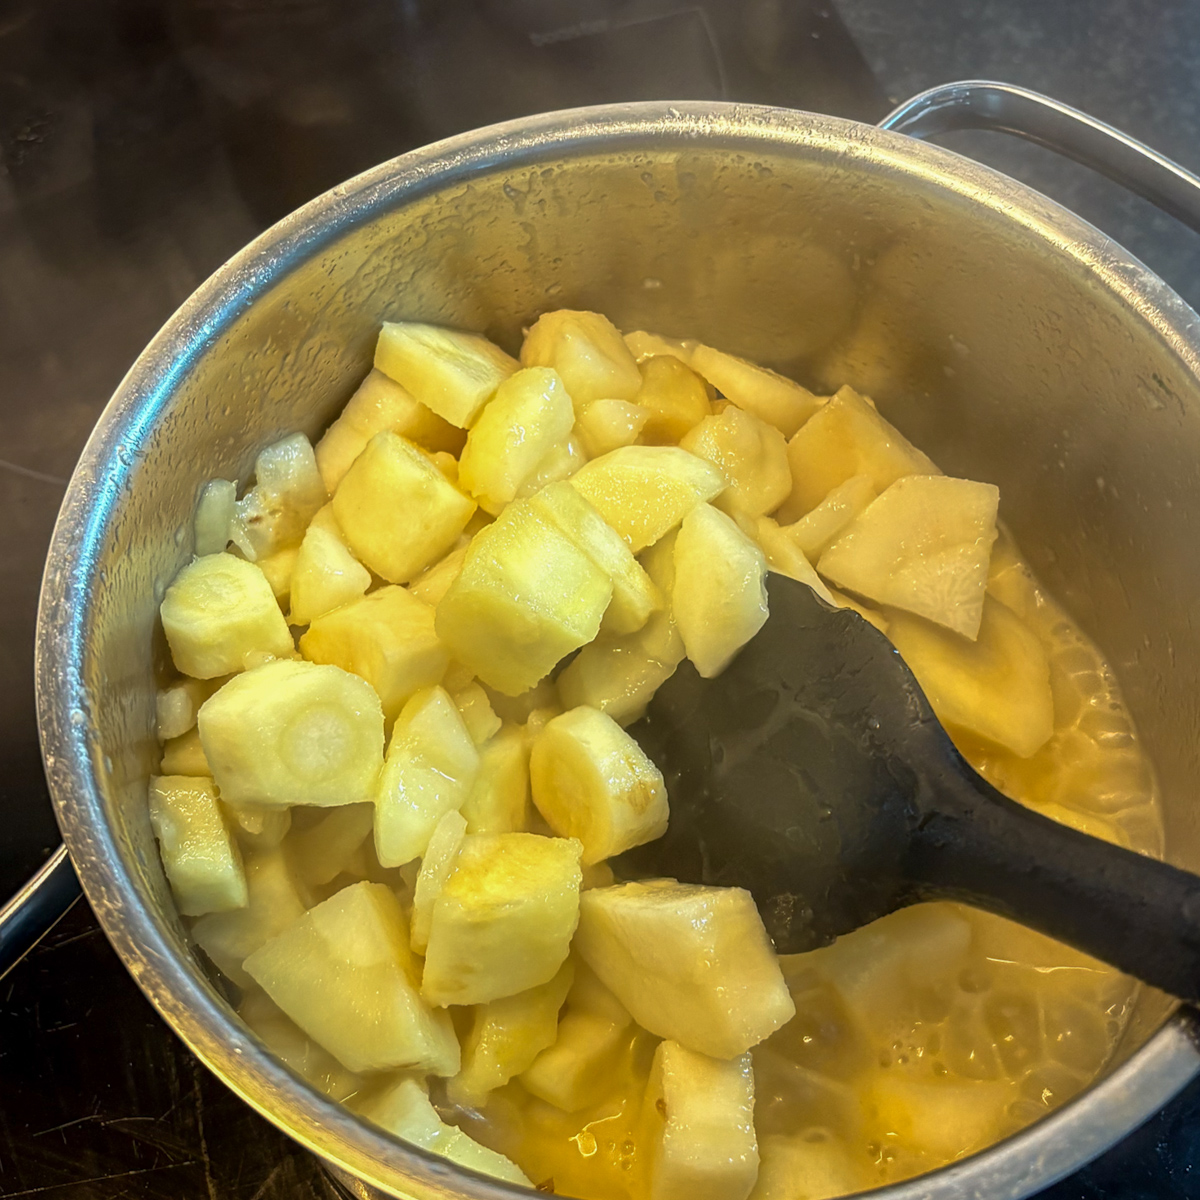
- Step 1: Wash, peel and chop the parsnips and pears into chunks of a similar size, so they cook at the same rate. Melt the unsalted butter in a heavy pot over a medium heat. Add the parsnips and cook, stirring now and then, for about 5 minutes, until some of the edges turn pale gold and start to caramelise. Tip the pears in and cook for another 3 minutes so they soften slightly and pick up some of that buttery flavour.
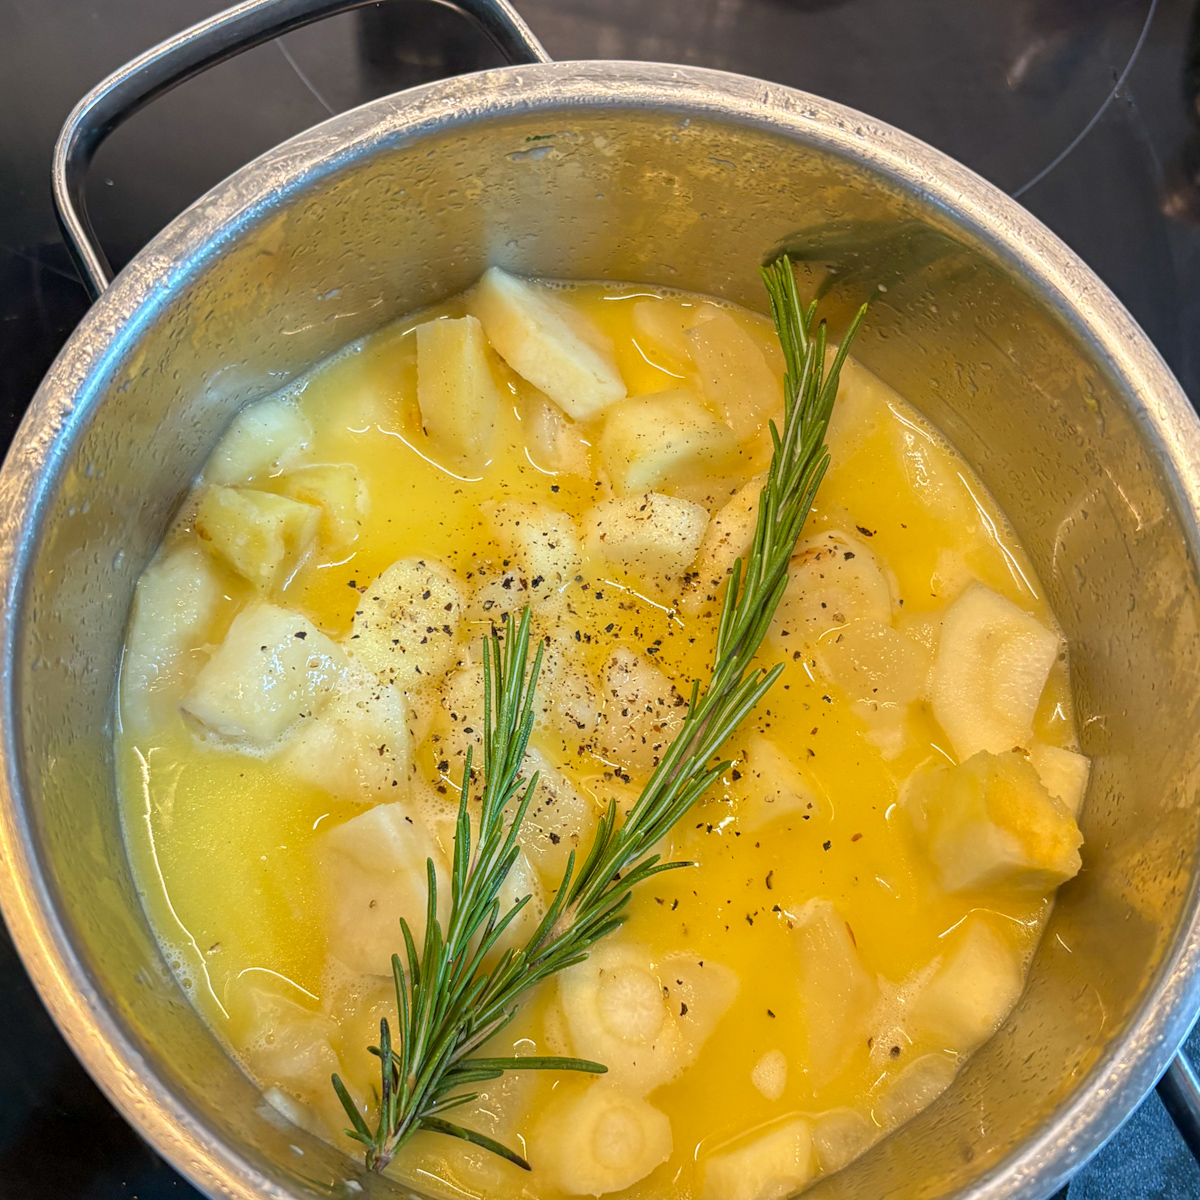
- Step 2: Season with salt and a twist of ground black pepper. Pour in just enough water to barely cover the parsnips — too much will dilute the flavour. Lay the whole rosemary sprigs on top. Bring the pot to the boil, then turn the heat down low and let everything simmer until the parsnips are tender all the way through; a fork should slide in with no resistance. Drain everything through a colander, discard the rosemary sprigs and any loose needles, then return the parsnips and pears to the pot. Keep the heat on low for a minute or two to evaporate any remaining moisture — this is the secret to a thick, silky purée rather than a watery one.
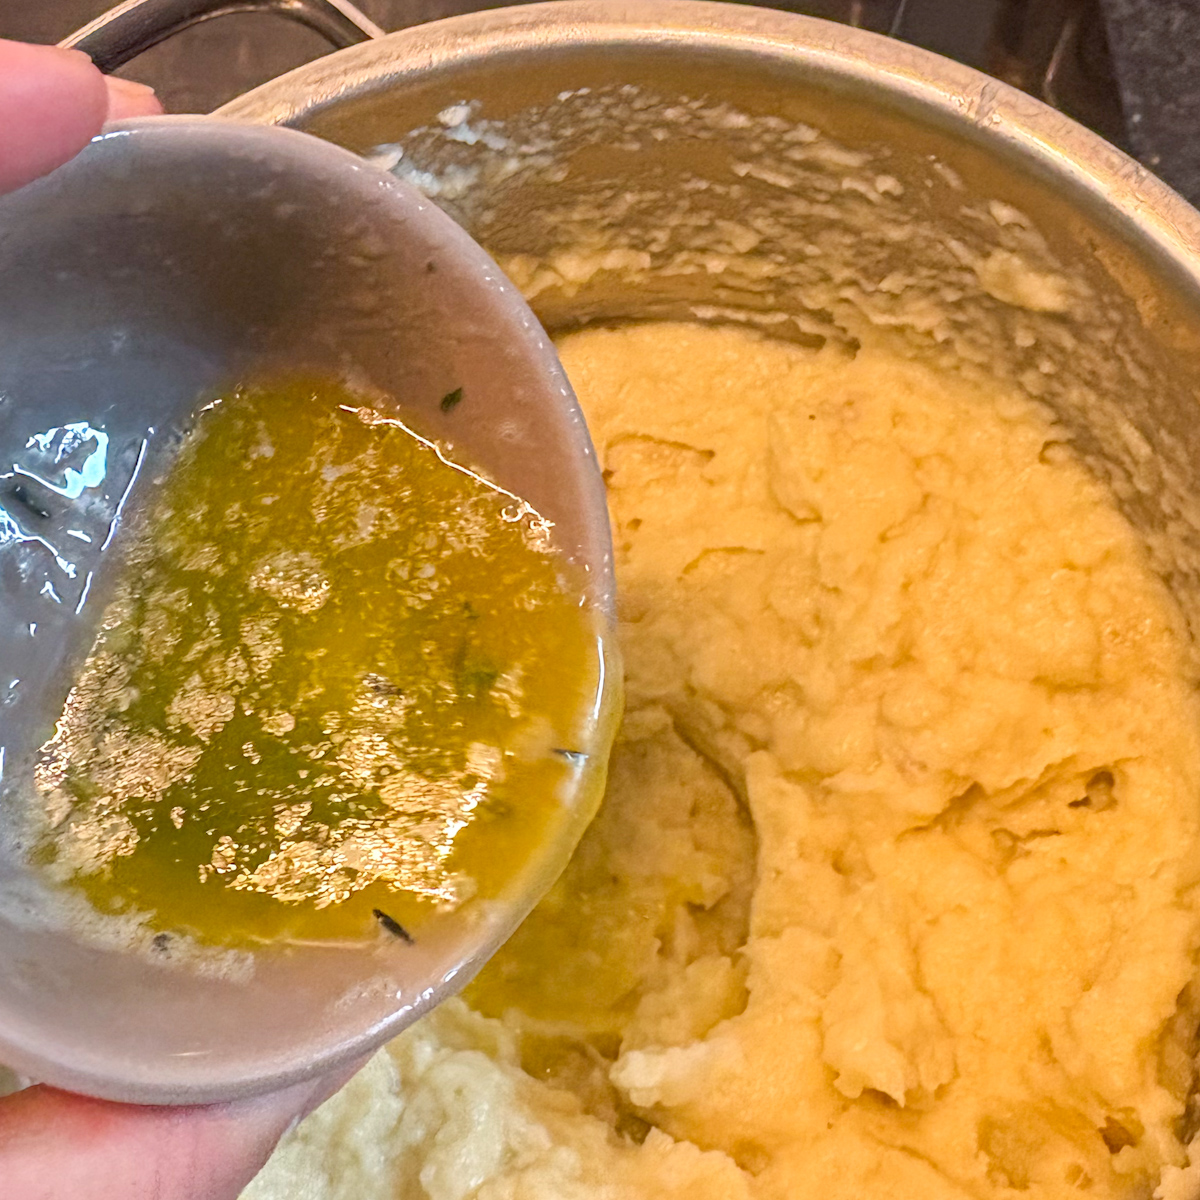
- Step 3: While the pot dries out, melt the second batch of butter with the thyme leaves. The easiest way is in a small microwave-safe bowl: heat for 15 seconds, give it a stir, then heat for another 15 seconds until fully melted. Pour the thyme butter straight into the pot with the parsnips and pears.
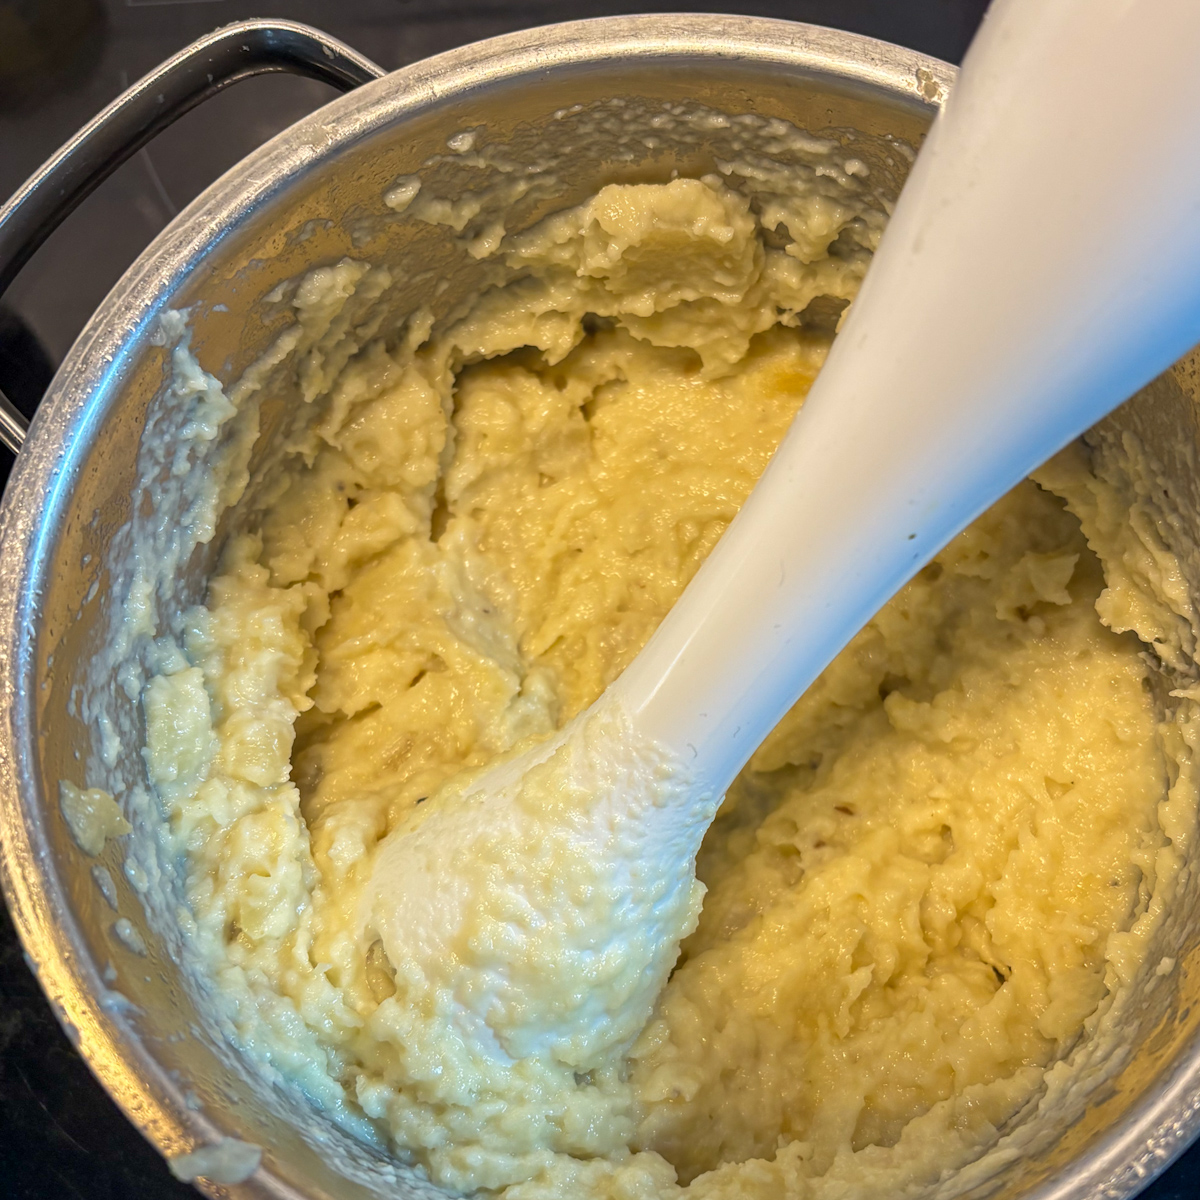
- Step 4: Now choose your texture. Use a hand blender (immersion blender) for ease, or move everything to a food processor for a smoother finish. Start on the lowest speed for about a minute, just to break the ingredients down. Pour in the double cream and keep blending until you reach the consistency you want — a few small lumps for a rustic texture, or completely smooth and silky for a restaurant-style finish. For that last level of silkiness, push the purée through a fine mesh sieve. Stir in the freshly grated nutmeg, taste, and adjust the salt and pepper if needed. Serve warm with a scatter of extra thyme leaves on top.
How to Serve and Store Parsnip and Pear Mash
This parsnip and pear mash makes a lovely partner for almost any roast. I serve it warm with roast pork - the sweetness of the pears works beautifully against savoury, fatty meat. It is also a wonderful parsnip mash for roast turkey at Christmas, and it sits well next to a roast chicken or a slow-cooked lamb shoulder. For a lighter meal, spoon it under pan-fried sausages with a small heap of caramelised onions, or use it as a base for grilled mushrooms and a poached egg.
Once cooked, the parsnip and pear mash keeps well in an airtight container in the fridge for up to 3 days. Reheat gently on the hob with a splash of milk or cream to bring it back to a silky consistency — the microwave works too, in short bursts with a stir between. The mash also freezes for up to 2 months; defrost overnight in the fridge and reheat slowly. Garnish with fresh thyme leaves just before serving.
Parsnip and Pear Mash Price Comparison Around the World
The lovely thing about this parsnip and pear mash is how cheap it is to make. Parsnips remain one of the more affordable winter vegetables in most countries, and a small bag is plenty for 4-6 people.
- In the UK, a 500g pack at Tesco, Sainsbury's, Aldi or Lidl costs around £0.64 to £0.99 per kilogram for standard parsnips, with organic varieties reaching £2.50 to £4.92 per kilogram.
- In Ireland, expect around €2.98 per kilogram at Tesco, with SuperValu and Dunnes Stores often running deals that bring 500g packs down to under €1.
- Over in the United States, retail parsnips usually sit between $0.69 and $1.47 per kilogram at Kroger, Walmart and Whole Foods, with organic ones reaching $3.68 per pound at specialty stores like Whole Foods or local food co-ops.
- Down in Australia, parsnips at Woolworths or Coles tend to run AU$5-7 per kilogram, often sold in small bags or loose by weight.
- In Canada, you'll find parsnips at Loblaws, Sobeys, Metro and No Frills for around CAD$3-5 per kilogram, with a 1 lb bag commonly priced at CAD$2-3 depending on the region — prices in Vancouver and St. John's typically run higher than Toronto or Montreal.
Across all five countries, the total cost of making this parsnip and pear mash for four to six people comes in well under £/€/$5, which makes it one of the most budget-friendly festive side dishes you can put on the table.
More Easy Side Dishes to Try Alongside Parsnip and Pear Mash
If you enjoyed this parsnip and pear mash, here are a few more simple side dishes from the blog that work just as well with a roast or a midweek meal.
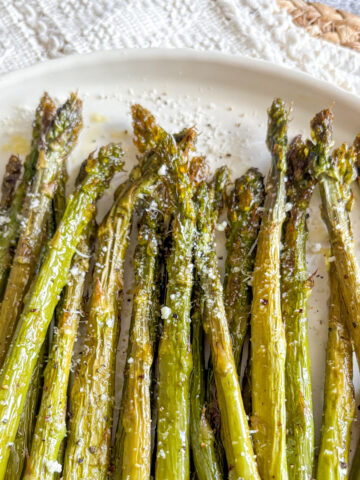
- A bright, fresh side worth trying - Easy Roasted Asparagus Recipe with Crispy Charred Tips. Tender asparagus with caramelised edges that comes together in under 15 minutes.
- A quick weeknight favourite - Crispy Parmesan Roasted Courgettes – Ready in Under 10 Minutes. Golden, cheesy courgettes with a satisfying crisp finish.
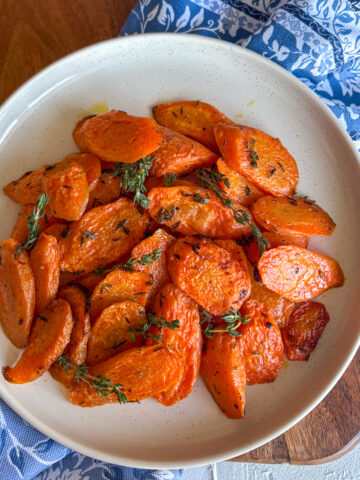
- For a sweet, herby root veg pairing - Perfectly Roasted Carrots Recipe with Fresh Thyme. Tender carrots glazed in butter and thyme that mirror the flavours in this dish.
- Something with a little more bite - Easy Charred Broccolini Recipe with Toasted Garlic Almonds. Smoky, garlicky broccolini with a satisfying crunch.
- Another easy roasted side - Roasted Broccoli and Cauliflower Recipe. A simple tray-bake of golden florets that pairs beautifully with this parsnip and pear mash.

Top Tips for the Best Parsnip and Pear Mash
- Choose firm parsnips with smooth skin. Parsnips that feel heavy for their size and have unblemished, pale ivory skin tend to be sweeter and less fibrous. Soft or rubbery parsnips often have a woody core that no amount of blending will smooth out. If you find a really thick parsnip, slice the core out before cooking. This single step makes a real difference to the final texture of your parsnip and pear mash.
- Cut everything to the same size. Even chunks cook at an even rate, which means no half-mushy, half-firm bites in the finished purée. Aim for pieces roughly 2-3 cm wide. This also helps the caramelising step in the pan, since matching surfaces brown together. Uneven chunks are the most common reason a parsnip mash ends up patchy in texture.
- Pick ripe but still firm pears. Pears that are overly soft fall apart in the pan and add too much water to the pot. Conference pears are a great choice in the UK because they hold their shape during a short sauté. Williams and Bartlett work too, as long as they still have a little give when pressed. Avoid anything mushy or bruised, since it can turn the purée slightly grainy.
- Don't skip the caramelising step. Five minutes of sautéing parsnips in butter before they hit the water might feel like a faff, but those gently caramelised edges give the parsnip and pear mash a deeper, slightly nutty flavour. The browning develops a quiet sweetness you cannot get from boiling alone. Stir occasionally, not constantly, so the cut sides have a chance to colour. This is the difference between a flat purée and one with real character.
- Use just enough water. Cover the parsnips with water, but no more. Too much liquid means a longer simmer, more flavour washed away, and a wetter pot at the end. You want the parsnips submerged, not swimming. If you only just cover them, the cooking liquid concentrates as it reduces slightly, leaving you with cleaner flavour.
- Use whole rosemary sprigs. Loose rosemary leaves are a pain to fish out, and a stray needle in the finished purée is not nice to bite into. Whole sprigs perfume the water beautifully and pull out in seconds. Lay them on top of the simmering vegetables and lift them out before draining. Discard them, along with any leaves that may have dropped off, before blending.
- Dry the pot before adding the butter. After draining, return the parsnips and pears to the warm pot and keep the heat on for a minute or two. Steam will rise off, taking any remaining moisture with it. Skipping this step leaves you with a wetter, looser purée that needs more cream to compensate. A dry pot is the foundation of a thick, silky parsnip and pear mash.
- Microwave the thyme butter gently. Melting butter with thyme leaves in the microwave in two 15-second bursts gently warms the herb without burning it. The brief heat releases the thyme's oils into the butter, which then carries that flavour through the whole pot. If you prefer the hob, use the lowest possible heat and watch closely - burnt thyme tastes bitter. The microwave is faster and more forgiving.
- Blend slowly at first. Starting the immersion blender on its lowest setting prevents the hot purée from splashing up the sides of the pot, and lets the ingredients break down evenly. Increase the speed gradually as the texture comes together. If you go too fast at the start, you can overwork the starch in the parsnips, which makes the mash gluey. Slow and steady gives the silkiest result.
- Pass through a fine sieve for a smooth parsnip purée recipe finish. If you want that proper restaurant-style smoothness, push the blended parsnip and pear mash through a fine mesh sieve or chinois with the back of a ladle. It takes a bit of effort but the result is glossy, lump-free and almost pourable. This is the version I serve when I want the dish to look elegant on a plate. For a more rustic feel, skip the sieve and leave a little texture.
Parsnip and Pear Mash FAQ
Can I make parsnip and pear mash ahead of time?
Yes, and it actually holds up beautifully. Cook the mash up to 24 hours in advance, cool it quickly, and store in an airtight container in the fridge. To reheat, warm it gently on the hob with a small splash of cream or milk, stirring until smooth and hot. This makes it a great option for entertaining when oven space is tight on a roast day.
Can I freeze parsnip and pear mash?
Absolutely. Cool the parsnip and pear mash completely, then transfer to a freezer-safe container with a tight lid. It keeps for up to 2 months without losing flavour. Defrost overnight in the fridge, then reheat on the hob with an extra knob of butter or a little cream to bring back the silky texture, since freezing can sometimes loosen it slightly.
What kind of pears work best?
Conference pears are the most reliable, since they are firm and hold their shape during a short sauté in butter. Williams (also called Bartlett) and Comice also work well, as long as they are ripe but still have some give. Avoid overripe pears, as they can turn the mash watery and slightly grainy. Two medium pears is the sweet spot for 1 kg of parsnips.
How do I get a smooth parsnip purée recipe finish without a fancy tool?
A hand blender (immersion blender) on the lowest speed gets you most of the way there. For an extra smooth finish, push the blended mash through a fine mesh sieve with the back of a spoon. A potato ricer is another option — pass the cooked parsnips through it before adding the butter and cream for a fluffy, lump-free base. A food processor will also do the job in seconds, though it can overheat the starch quickly.
Is parsnip and pear mash gluten-free?
Yes, naturally. None of the ingredients in this recipe — parsnips, pears, butter, cream, herbs and seasoning — contain gluten. Just double-check any stock or seasoning you add yourself, and keep an eye on butter brands if you are catering for someone with coeliac disease. It is also a great alternative to mashed potatoes for low-carb diners, since parsnips are slightly lower in starch.
How do I stop my parsnip mash from being gluey?
The most common cause of a gummy texture is over-blending in a food processor. Parsnips have less starch than potatoes, but they can still go pasty if you overwork them. Start blending on the lowest speed, stop as soon as the texture is smooth, and avoid running the machine for too long. A hand blender used in short bursts is more forgiving than a food processor.
What other herbs work in this parsnip and pear mash?
Thyme is my first choice because it is gentle and woodsy, but sage works beautifully with parsnips too. Try a few finely chopped sage leaves melted with the butter, especially around the festive season. A pinch of finely chopped chives stirred in at the end adds a fresh, oniony lift. For a deeper, more aromatic version, swap the thyme for a small sprig of fresh tarragon — it pairs really well with pear.
Related
Looking for other recipes like this? Try these:
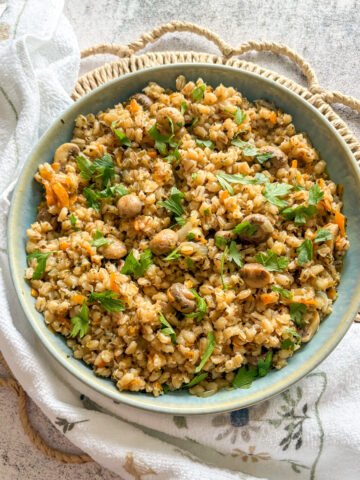
- Budget-Friendly Pearl Barley with Mushrooms
- Summer Peas with Bacon and Ricotta (Hot or Cold)
- Easy Chickpeas in Tomato Sauce Recipe (Budget-Friendly Struggle Meal)
- Easy Roasted Turnips Recipe with Herbs and Olive Oil
Pairing
These are my favorite dishes to serve with parsnip and pear mash:
- The Best Mussel Pasta Recipe in a Creamy Garlic Butter Sauce
- Herb Butter Roast Chicken with Crispy Golden Skin
- Sticky Baked Guinness Chicken Wings with a Smoky Dry Rub
- Tender Oven Braised Pork Gigot Chops with Lemon and Garlic

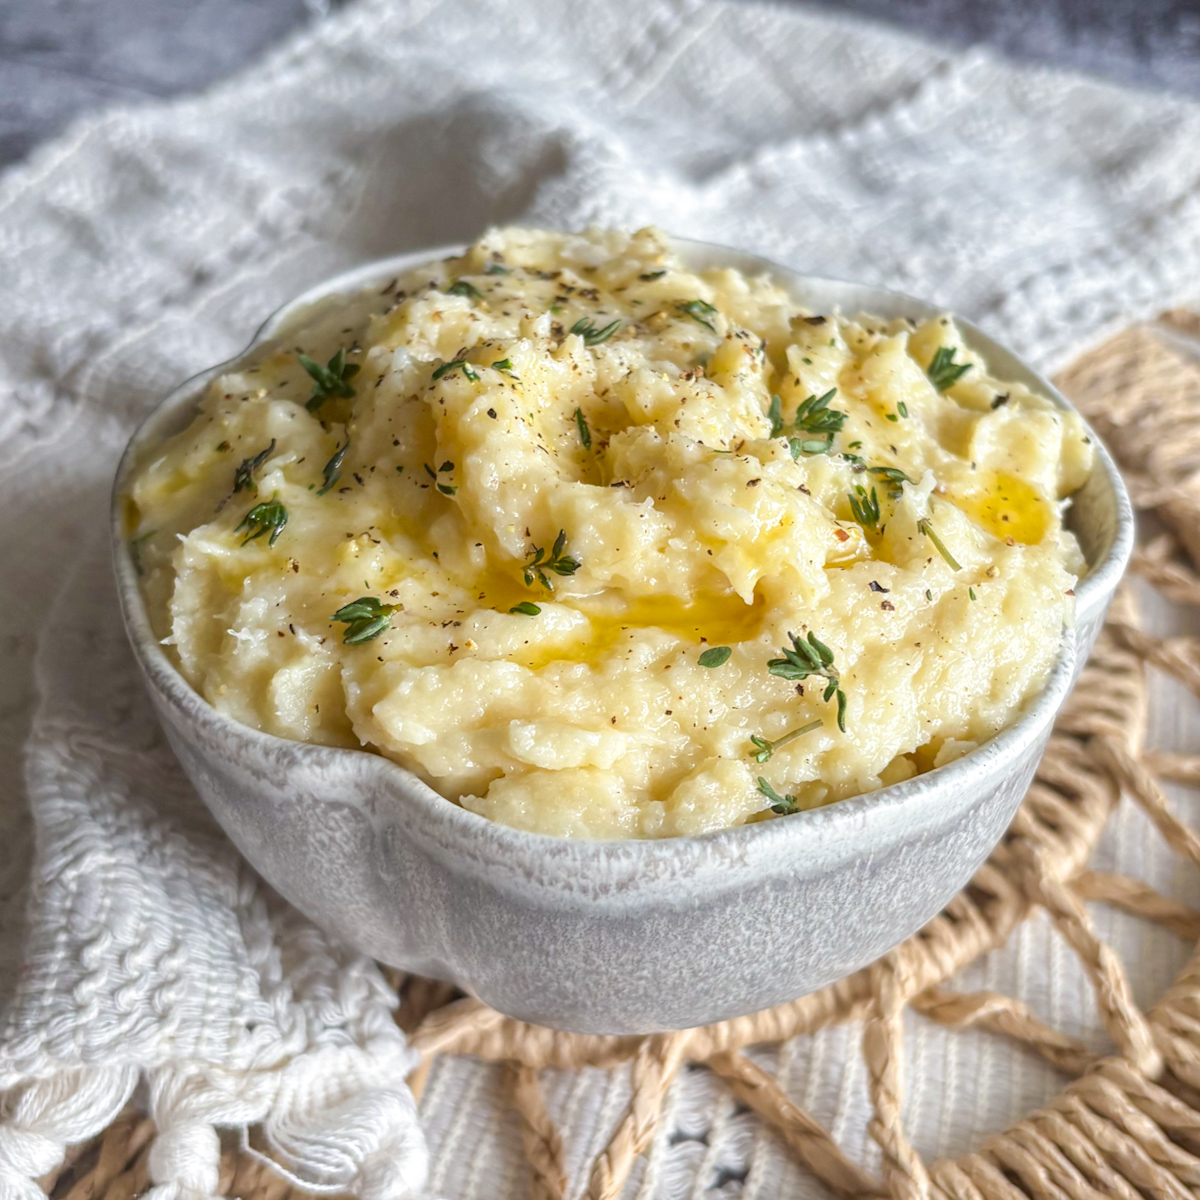
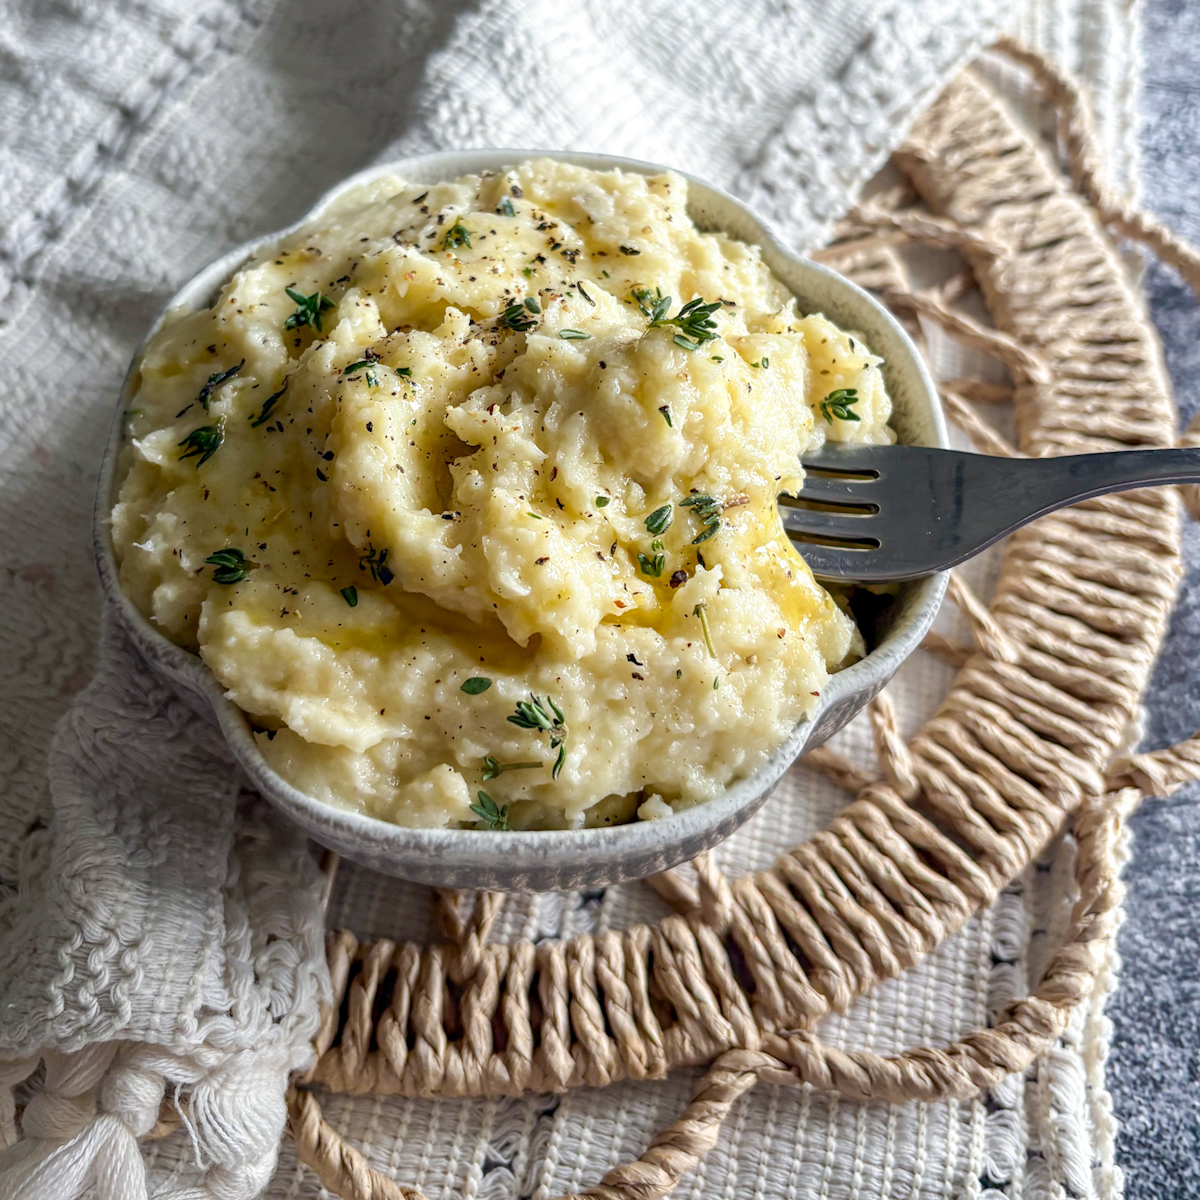
Creamy Parsnip and Pear Mash with Thyme Butter

Parsnip and pear mash is a silky, buttery side dish made with fresh parsnips, ripe pears, thyme-infused butter and a splash of double cream. Naturally sweet, lightly herby and ready in under 40 minutes - a beautiful alternative to mashed potatoes for any roast dinner or festive meal.
Ingredients
- 1 kg parsnips (2.2 lb), firm, peeled and cut into similar-sized chunks
- 2 pears, ripe but still firm, peeled and cut into chunks
- 2 tablespoon unsalted butter — for sautéing the parsnips
- 4 tablespoon unsalted butter — for melting with the thyme
- 1-2 fresh rosemary sprigs
- 50 ml double cream (scant ¼ cup heavy cream)
- 1 tablespoon fresh thyme leaves, picked from the sprigs
- Sea salt, to taste
- Ground black pepper, to taste
- A pinch of freshly grated nutmeg
Instructions
- Wash and peel the parsnips, then cut them into roughly equal-sized chunks. Peel the pears, remove the cores, and cut into similar-sized pieces.
- Melt 2 tablespoon of unsalted butter in a heavy pot over a medium heat. Add the parsnips and cook, stirring occasionally, for 5 minutes, until the edges start to caramelise lightly. Add the pears and cook for a further 3 minutes.
- Season with a pinch of sea salt and a twist of ground black pepper. Pour in just enough water to cover the parsnips. Lay the whole rosemary sprigs on top. Bring to the boil, then reduce the heat to low and simmer gently until the parsnips are fork-tender.
- Drain through a colander and discard the rosemary sprigs along with any loose leaves. Return the parsnips and pears to the warm pot. Keep the heat on low for 1-2 minutes to evaporate any leftover moisture.
- In a small microwave-safe bowl, combine the remaining 4 tablespoon of butter with the thyme leaves. Microwave for 15 seconds, stir, then microwave for another 15 seconds until fully melted. Pour the thyme butter straight into the pot.
- Using a hand blender on the lowest setting, blend the parsnips and pears for about 1 minute to break them down. Pour in the double cream and continue blending until you reach the consistency you prefer — slightly rustic with a few lumps, or completely smooth and silky.
- For an extra-smooth, restaurant-style finish, pass the purée through a fine mesh sieve. Stir in the freshly grated nutmeg, taste, and adjust the seasoning if needed.
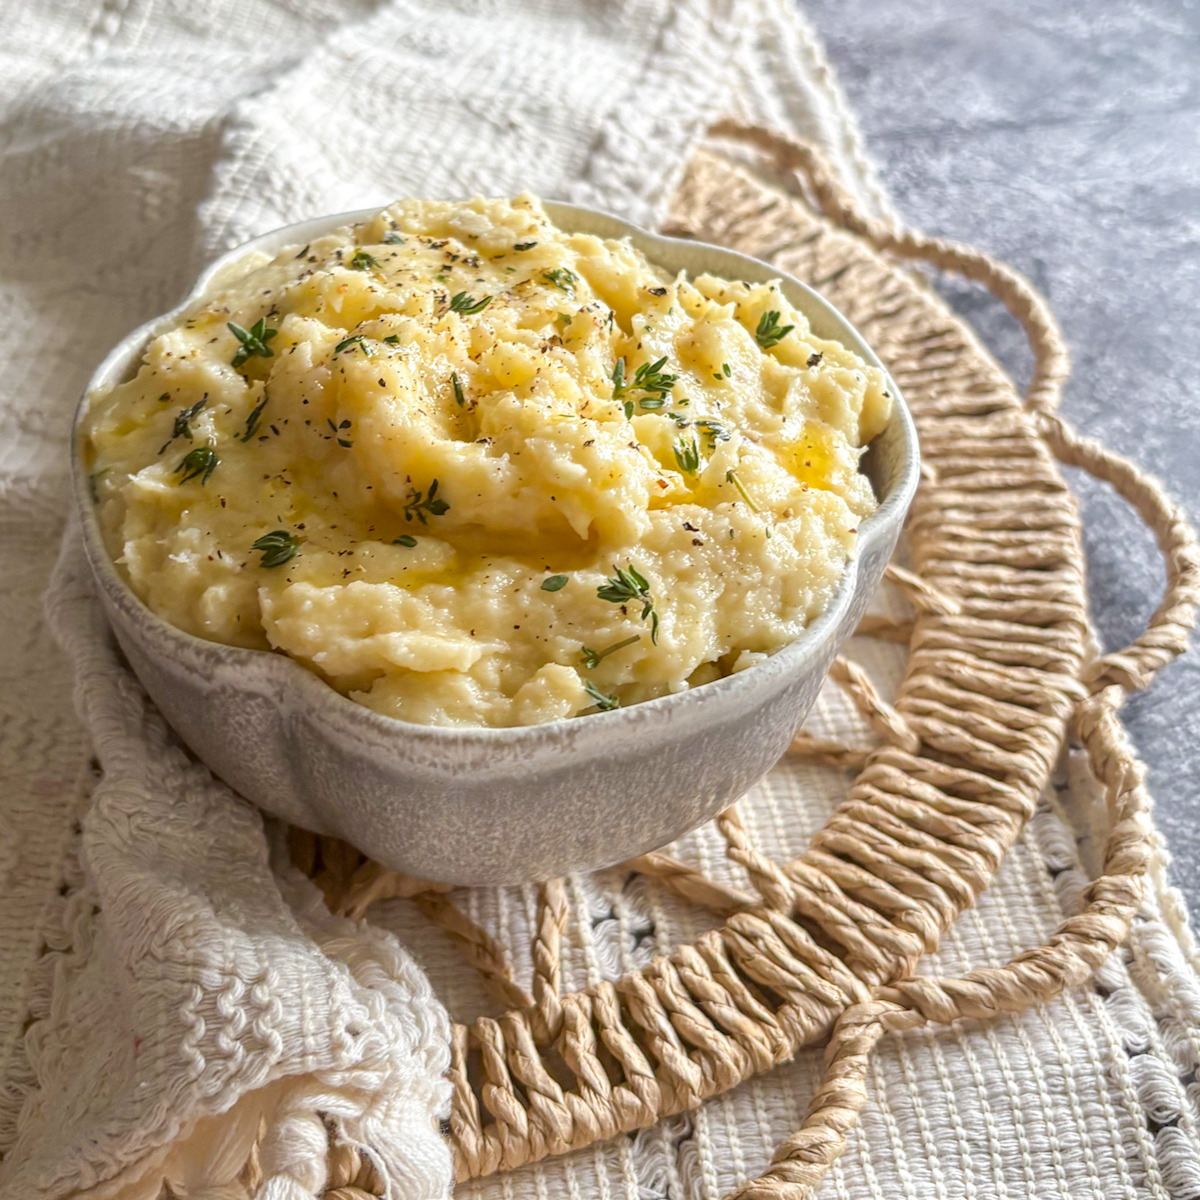
- Serve warm, garnished with extra thyme leaves.